TinyLab

Keep eyes on the star and feet on the ground.


  • 首页

  • 归档

  • 分类

  • 标签

每周一荐: GoodReader, Machinarium, 悲怆交响曲

发表于 2010-12-04   |   分类于 每周一荐   |  

好的东西,推荐给大家!希望大家每一天都有新的发现!

Software:GooReader

Google Books里有很多值得一读的好书,不过网页版用户体验做的确实是差了点,不仅有点卡还让你感觉不出是在读一本书。

好在有GooReader,这个Windows下的应用程序可以让你直接搜索Google Books里的图书,并在书架上直接阅读,带有绿色书签的书可以直接阅读,而红色标签的书则表示无法阅读全文(Google Books的限制)。打开一本书之后你可以缩放(不过不一定保证清晰,取决于Google的扫描质量),不过目前无法加书签也无法将一本书加入收藏。

GooReader有免费版和付费版,区别在于是否可以将图书存为PDF格式保存,目前仅有Windows版本,且需要装有.NET 3.51 SP1。

还可以将自己电脑里面的PDF格式的书籍,用GooReader来管理,非常方便!

GooReader
GoodReader


Game:Machinarium:机械迷城

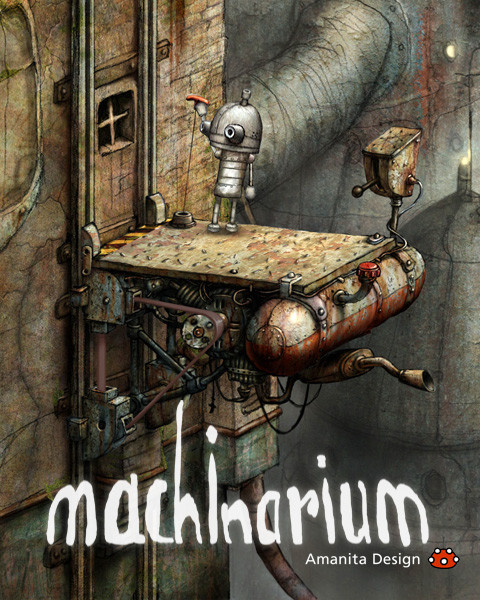
《Machinarium:机械迷城》由捷克独立开发小组Amanita Design设计制作的作品,此作堪称以独特的水墨风格展现给玩家的是一款冒险解谜游戏,对于我这个不怎么喜欢玩游戏的人来说,它的确挺好玩的,不过因为休息时间比较少,每天也就玩一小会儿,不过真的很不错,推荐给大家。

游戏将采用传统点击式界面,和Samorost游戏相似,2D背景和人物,没有对白.不过,Machinarium游戏时间将更长更复杂,画面将由手画,而玩家有个小物品栏。 Machinarium中每个人都是机器人,包括我们的小英雄,他将对从 “Black Cap Brotherhood”来的坏人。本游戏在2009年独立游戏节上斩获了视觉艺术奖。

Machinarium

Music:第六交响曲(悲怆)

柴可夫斯基的第六交响曲(悲怆)大约在1893年八月末至九月间完成,为作者的代表作。柴科夫斯基自认为这部交响曲是他一生中最成功的作品,也是他最得意的杰作。本曲首演于同年的十月二十八日,六天之后,作者不幸染上霍乱,与世长辞。本曲终成为柴科夫斯基的“天鹅之歌”。

这首交响曲正如标题所示,强烈地表现出“悲怆”的情绪,这一点也就构成本曲的特色。柴科夫斯基音乐的特征,如旋律的优美,形式的均衡,管弦乐法的精巧等优点,都在本曲中得到深刻的印证,因此本曲不仅是柴科夫斯基作品中最著名、最杰出的乐曲之一,也是古今交响曲中第一流的精品。

本交响曲旨在描写人生的恐怖、绝望、失败、灭亡等,充满了悲观的情绪,而否定了一切肯定、享受人生的乐观情绪。作者在本曲中也刻意描写了人们为生活而奔忙的情景,但他揭示了一个永恒的真理——死亡是绝对的、无可避免的,而生活中的所有欢乐都是转瞬即逝的。作者所体现出的这类情绪,实际上反映的是在沙皇俄国末期,俄罗斯人民处于一种被压抑状况下的真实心态。

本曲虽属于标题音乐,但决不是针对某一特定事件或某一特殊个人的感情描写,只是以抽象手法表现人类共同具有的悲怆情绪而已。因此有的乐评家认为,本曲不应视为纯粹的标题音乐。

全曲共分为四个乐章:

第一乐章 慢板,转不很快的快板,b小调,4/4拍子,奏鸣曲形式。序奏为慢板,低音提琴以空虚的重音作为引子,由低音管在低音区演奏出呻吟般的旋律,其他乐器则如叹息般地继续。乐曲自开始就笼罩在一种烦躁不安的阴沉气氛中。主部的第一主题快速而富节奏感地奏出,给人以苦恼、不安和焦燥的印象。之后乐曲的速度旋即转成行板,第二主题哀愁而美丽,有如暂时抛却苦恼而沉入幻想中一般(片段1)。本乐章的终结部十分柔美、温和,旋律在平静的伴奏下伸展,形成谜一样的结尾。

第二乐章 温柔的快板,D大调,5/4拍子。自始自终 一贯单纯的色彩,其构想似乎来自俄罗斯民谣。5/4拍子的分配方式为, 各小节的前半部分为二拍,后半部分为三拍,形成了不安定而又稍快的音乐,全乐章呈现出昏暗、低迷的状态。主部的主要旋律具有舞蹈般的节奏,却又荡漾着一丝不安的空虚感(片段2)。

第三乐章 甚活泼的快板,G大调,4/4拍子,谐谑曲与进行曲混合而无发展部的奏鸣曲式。这一乐章的主要内容反映了人们四处奔忙、积极生活的景象,有人认为这一乐章体现出作者对过去的回忆。本乐章第一主题为谐谑曲式,轻快、活泼,与前两个乐章的主题形成对比(片段3)。 乐章的第二主题很像意大利南部的一种民族舞蹈音乐——塔兰泰拉舞曲,其主要旋律具有战斗般的感觉,但这一主题在进行曲般的旋律中,并没有明朗、快活的气息,反而呈现出一种悲壮感。 这一主题旨在表现人类的苦恼爆发时,所发泄出的反抗力量(片段4)。 此部分略经扩展后,再次出现诙谐曲主题而达到高潮。紧接着进行曲主题再现,乐章的终结部便在进行曲主题片断堆积的形态下强烈地结束。

第四乐章 终曲,哀伤的慢板,b小调,3/4拍,自由的三段体。 本乐章的主题极为沉郁、晦暗(一般交响曲的终曲都是最为快速、壮丽的乐章,而本交响曲正相反,充分强调了“悲怆”的主题),悲伤的旋律在两声圆号的衬托下显得更加凄凉(片段5)。 本乐章在无限凄寂当中结束。这一乐章正如本交响曲的标题,描写人生的哀伤、悲叹和苦恼,凄怨感人,有深沉的悲怆之美。

Refrence

  1. http://www.gooreader.com/
  2. http://www.hongxiao.com/mq0/c.beichuang/0.htm

Prototype模式去掉Clone方法

发表于 2009-10-12   |   分类于 设计模式   |  

意图:

用原型实例指定创建对象的种类,并且通过拷贝这些原型创建新的对象。

结构图:

结构图

Prototype的主要缺陷是每一个Prototype的子类都必须实现Clone操作,这很烦。
一般都这样实现:

1
2
3
4
5
Prototype* ConcretePrototype::Clone()
{
return new ConcretePrototype(*this);
}

现在想去掉这个重复的操作

结构图如下:

结构图

实现如下:

1
2
3
4
5
6
7
8
9
10
11
12
13
14
15
16
17
18
19
20
21
22
23
class PrototypeWrapper
{
public:
~PrototypeWrapper() {}
virtual Prototype* clone() = 0;
};
template <typename T>
class PrototypeWrapperImpl : public PrototypeWrapper
{
public:
PrototypeWrapperImpl()
{
_prototype = new T();
}
virtual Prototype* clone()
{
return new T(*_prototype);
}
private:
T* _prototype;
};

使用:

1
2
3
PrototypeWrapper* prototype = new PrototypeWrapperImpl<ConcretePrototype>();
Prototype* p = prototype->clone();

编译时断言和运行时断言

发表于 2009-08-26   |   分类于 Linux开发   |  

通常为了检测一些条件,我们往往在程序里面加断言。一般只在DEBUG版有效,RELEASE版断言不生成任何代码。C++可以使用两种断言: 静态断言和动态断言,即就是运行期断言和编译期断言!顾名思义,运行期断言是在程序运行过程中判断指定的条件,若条件满足,万事OK,若断言失败,则程序给出提示然后被abort掉;编译期断言是在编译时候检查条件是否满足,不满足情况下,编译器给出错误提示(需要人为实现),只要条件不成立,程序是编译不过的。静态断言,BOOST库有实现(boost/static_assert.hpp),主要原理就是根据”sizeof(不完整类型)”会报错。动态断言在cassert库文件有实现。实现如下:

动态断言:(cassert)

1
2
3
4
5
6
7
8
9
10
11
12
#ifdef NDEBUG
// 不做任何处理
# define assert(expr)
#else
// __assert_failed 打印错误消息(包含表达式串,文件,所在行,所在函数名),然后abort()。
# define assert(expr) ((expr) ? 0 : __assert_failed(__STRING(expr), __FILE__, __LINE__, __PRETTY_FUNCTION__, 0))
#endif

静态断言:(boost/static_assert.hpp)

1
2
3
4
5
6
7
8
9
10
11
12
13
template <bool x> struct STATIC_ASSERTION_FAILURE;
template <> struct STATIC_ASSERTION_FAILURE<true> { enum { value = 1 }; };
template<int x> struct static_assert_test{};
#define BOOST_STATIC_ASSERT( B ) /
typedef ::boost::static_assert_test</
sizeof(::boost::STATIC_ASSERTION_FAILURE< (bool) (B) >)
> boost_static_assert_typedef_
// 当B为false时,sizeof(STATIC_ASSERTION_FAILURE<false>),STATIC_ASSERTION_FAILURE<false>)没有实现(不能实例化),为不完整类,编译器报错!

注意:和动态断言不同的是,静态断言可以在名称空间,类,函数,模板(函数模板和类模板)中使用,因为他用的是typedef。

静态断言的详细用法,查看:http://www.boost.org/doc/libs/1_39_0/doc/html/boost_staticassert.html

Kernel. EXPORT_SYMBOL解析

发表于 2009-04-01   |   分类于 Linux   |  

Code Segment:

1
2
3
4
5
6
7
8
9
10
11
12
13
14
15
16
17
18
19
20
21
22
23
24
include/module.h:
struct kernel_symbol
{
unsigned long value;
const char *name;
};
/* For every exported symbol, place a struct in the __ksymtab section */
#define __EXPORT_SYMBOL(sym, sec) /
__CRC_SYMBOL(sym, sec) /
static const char __kstrtab_##sym[] /
__attribute__((section("__ksymtab_strings"))) /
= MODULE_SYMBOL_PREFIX #sym; /
static const struct kernel_symbol __ksymtab_##sym /
__attribute_used__ /
__attribute__((section("__ksymtab" sec), unused)) /
= { (unsigned long)&sym, __kstrtab_##sym }
#define EXPORT_SYMBOL(sym) /
__EXPORT_SYMBOL(sym, "")
#define EXPORT_SYMBOL_GPL(sym) /
__EXPORT_SYMBOL(sym, "_gpl")
#endif

Analysis:

  1. kernel_symbol: 内核函数符号结构体

    value: 记录使用EXPORT_SYMBOL(fun),函数fun的地址
    name: 记录函数名称(”fun”),在静态内存中

  2. EXPORT_SYMBOL(sym) :导出函数符号,保存函数地址和名称

宏等价于:(去掉gcc的一些附加属性,MODULE_SYMBOL_PREFIX该宏一般是””)

static const char __kstrtab_sym[] = "sym";
static const struct kernel_symbol __ksymtab_sym =
    {(unsigned long)&sym, __kstrtab_sym }
  1. gcc 附加属性

atrribute 指定变量或者函数属性。在此查看详细http://gcc.gnu.org/onlinedocs/gcc-4.0.0/gcc/Variable-Attributes.html#Variable-Attributes。

__attribute((section(“section-name”)) var : 编译器将变量var放在section-name所指定的data或者bss段里面。

很容易看出:EXPORT_SYMBOL(sym)将sym函数的名称kstrtab_sym记录在,段名为”kstrtab_strings”数据段中。 将sym所对应的kernel_symbol记录在名为__ksymtab段中。

EXPORT_SYMBOL_GPL(sym) 和EXPORT_SYMBOL不同之处在于sym对应的kenel_symbol记录在__ksymtab_gpl段中。

深入Pthread(五):线程属性

发表于 2009-02-18   |   分类于 Linux开发   |  

线程属性相关API

phtread_attr_t attr;
int pthread_attr_init(pthread_attr_t* attr);
int pthread_attr_destroy(pthread_attr_t* attr);
int pthread_attr_getdetachstate(pthread_attr_t* attr, int* detachstate);
int pthread_attr_setdetachstate(pthread_attr_t* attr, int detachstate);

#ifdef _POSIX_THREAD_ATTR_STACKSIZE
int pthread_attr_getstacksize(pthread_attr_t* attr, size_t* stacksize);
int pthread_attr_setstacksize(pthread_attr_t* attr, size_t stacksize);
#endif

#ifdef _POSIX_THREAD_ATTR_STACKADDR
int pthread_attr_getstackaddr(pthread_attr_t* attr, void* stackaddr);
int pthread_attr_setstackaddr(pthread_attr_t* attr, void** stackaddr); 
#endif

线程属性

POSIX定义的线程属性有:可分离状态(detachstate), 线程栈大小(stacksize),线程栈地址( stackaddr),作用域(scope), 继承调度(inheritsched), 调度策略(schedpolicy)和调度参数( schedparam)。 有些系统并不支持所有这些属性,使用前注意查看系统文档。

但是所有Pthread系统都支持detachstate属性,该属性可以是PTHREAD_CREATE_JOINABLE或PTHREAD_CREATE_DETACHED,默认的是joinable的。拥有joinable属性的线程可以被另外一个线程等待,同时还可以获得线程的返回值,然后被回收。而detached的线程结束时,使用的资源立马就会释放,不用其他线程等待。

线程stacksize属性移植性不是很好,若你的系统定义了_POSIX_THREAD_ATTR_STACKSIZE ,才可以调用api设定线程堆栈大小。Pthreads规定线程堆栈大小必须大于等于PTHREAD_STACK_MIN。

线程stackaddr属性移植性相当不好,若系统定义了_POSIX_THREAD_ATTR_STACKADDR,才可以调用api设定线程堆栈地址,指定一块内存区域,这块内存区域大小至少是PTHREAD_STACK_MIN。机器堆栈向上增长的,必须指定为低地址;机器堆栈向下增长的,必须指定为高地址。这个属性,最好不要用。

例程:

1
2
3
4
5
6
7
8
9
10
11
12
13
14
15
16
17
18
19
20
21
22
23
24
25
26
27
28
29
30
31
32
33
34
35
36
37
38
39
40
41
42
43
44
45
46
47
48
49
50
51
52
53
54
55
#include <pthread.h>
#include "error.h"
#include <limits.h>
pthread_attr_t attr;
void* thread_routine(void* arg)
{
sleep(1);
#ifdef _POSIX_THREAD_ATTR_STACKSIZE
size_t stacksize;
int status = pthread_attr_getstacksize(&attr, &stacksize);
printf("[stacksize:%lu]thread routine is running..../n",stacksize);
#endif
return NULL;
}
int main()
{
pthread_t pid;
int status;
size_t stacksize;
status = pthread_attr_init(&attr);
if(status != 0)
ERROR_ABORT(status,"Init attr");
status = pthread_attr_setdetachstate(&attr, PTHREAD_CREATE_DETACHED);
if(status != 0)
ERROR_ABORT(status, "Set detachstate");
#ifdef _POSIX_THREAD_ATTR_STACKSIZE
status = pthread_attr_getstacksize(&attr, &stacksize);
if(status != 0)
ERROR_ABORT(status, "Get stacksize");
printf("Original thread size:%lu/n", stacksize);
status = pthread_attr_setstacksize(&attr, 2*PTHREAD_STACK_MIN);
if(status != 0)
ERROR_ABORT(status, "Set stacksize");
#endif
status = pthread_create(&pid, &attr, thread_routine, NULL);
if(status !=0 )
ERROR_ABORT(status, "Create thread");
status = pthread_attr_destroy(&attr);
if(status != 0)
ERROR_ABORT(status, "Destroy attr");
printf("Main thread is over.../n");
pthread_exit(NULL);
}

深入Pthread(四):一次初始化-pthread_once_t

发表于 2009-02-16   |   分类于 Linux开发   |  

用到的API:

pthread_once_t once_control = PTHREAD_ONCE_INIT;
int pthread_once(pthread_once_t* once_control, void (*init_routine)(void));

有些事需要一次且仅需要一次执行。通常当初始化应用程序时,可以比较容易地将其放在main函数中。但当你写一个库时,就不能在main里面初始化了,你可以用静态初始化,但使用一次初始化(pthread_once_t)会比较容易些。

例程:

1
2
3
4
5
6
7
8
9
10
11
12
13
14
15
16
17
18
19
20
21
22
23
24
25
26
27
28
29
30
31
32
33
34
35
36
37
38
39
40
41
42
43
44
45
46
47
48
49
50
51
52
53
54
55
56
57
58
59
60
61
62
63
64
65
#include <pthread.h>
#include "errors.h"
pthread_once_t once_block = PTHREAD_ONCE_INIT;
pthread_mutex_t mutex;
/*This is the one-time initialization routine. It will be
* called exactly once, no matter how many calls to pthread_once
* with the same control structure are made during the course of
* the program.
*/
void once init routine (void)
{
int status;
status = pthread_mutex_init (&mutex, NULL);
if (status != 0)
err_abort (status, "Init Mutex");
}
/* Thread start routine that calls pthread_once.
*/
void *thread routine (void *arg)
{
int status;
status = pthread_once (&once_block, once_init_routine);
if (status != 0)
err_abort (status, "Once init");
status = pthread_mutex_lock (&mutex);
if (status != 0)
err_abort (status, "Lock mutex");
printf ("thread routine has locked the mutex./n");
status = pthread_mutex_unlock (&mutex);
if (status ! = 0)
err_abort (status, "Unlock mutex");
return NULL;
}
int main (int argc, char *argv[])
{
pthread_t thread_id;
char *input, buffer[64];
int status;
status = pthread_create (&thread_id, NULL, thread_routine, NULL);
if (status != 0)
err_abort (status, "Create thread");
status = pthread_once (&once_block, once_init_routine);
if (status != 0)
err_abort (status, "Once init");
status = pthread_mutex_lock (&mutex);
if (status != 0)
err_abort (status, "Lock mutex");
printf ("Main has locked the mutex./n");
status = pthread_mutex_unlock (&mutex);
if (status != 0)
err_abort (status, "Unlock mutex");
status = pthread_join (thread_id, NULL);
if (status != 0)
err_abort (status, "Join thread");
return 0;
}

深入Phtread(三):线程的同步-Condition Variables

发表于 2009-02-12   |   分类于 Linux开发   |  

继续昨天的线程同步,条件变量(Condition Variables)是用于线程间,通信共享数据状态改变的机制。

简介

当线程互斥地访问一些共享的状态时,往往会有些线程需要等到这些状态改变后才应该继续执行。如:有一个共享的队列,一个线程往队列里面插入数据,另一个线程从队列中取数据,当队列为空的时候,后者应该等待队列里面有值才能取数据。而共享数据(队列)应该用mutex来保护,为了检查共享数据的状态(队列是否为空),线程必须先锁定mutex,然后检查,最后解锁mutex。

问题出来了:当另外一个线程B锁定mutex后,往队列里面插入了一个值,B并不知道A在等着它往队列里面放入一个值。,线程A(等待状态改变)一直在运行,线程B可能已经检查过队列是空的,并不知道队列里已经有值了,所以一直阻塞着自己。为了解决这样的问题引入了条件变量机制。线程B等待于一个条件变量,当线程A插入了一个值后,signal或broadcast这个条件变量,通知线程B状态已改变,A发现条件变量被signaled了,就继续执行。就这样,当一个线程改变共享数据状态后,可以及时通知那些等待于该状态的线程。图示下:

条件变量

中间的矩形代表条件变量,当线程线位于矩形内,表示线程等待该条件变量。位于中心线下下方,则表示signal了该条件变量。

开始线程1 signal 了条件变量,由于没有其他线程等待于该条件变量,所以没什么效果。然后,线程1和线程2先后等待该条件变量,过了一会,线程3 signal了条件变量,线程3的信号解除了线程1的阻塞。然后,线程3等待该条件变量。最后线程1 broadcast了该条件变量,同时解除了等待于条件变量的线程1和线程2。

条件变量的创建和销毁

pthread_cond_t cond = PTHREAD_COND_INITIALIZER;
int pthread_cond_init(pthread_cond_t* cond, pthread_condattr_t* condattr);
int pthread_cond_destroy(pthread_cond_t* cond);

和互斥量一样,可以动态创建和静态创建。

静态创建:条件变量声明为extern或static变量时。

例程:

1
2
3
4
5
6
7
8
9
10
11
12
13
14
15
16
17
#include <pthread.h>
#include "error.h"
typedef struct my_struct_tag
{
pthread_mutex_t mutex;
pthread_cond_t cond;
int value;
} my_struct_t;
my_struct_t data = {PTHREAD_MUTEX_INITIALIZER, PTHREAD_COND_INITIALIZER, 0};
int main()
{
return 0;
}

动态创建:一般情况下,条件变量要和它的判定条件定义在一起,此时若包含该条件变量的数据动态创建了,则条件变量也需要动态创建,不过记得不用时用pthread_cond_destroy销毁。

例程:

1
2
3
4
5
6
7
8
9
10
11
12
13
14
15
16
17
18
19
20
21
22
23
24
25
26
27
28
29
30
31
32
33
34
35
36
37
38
39
#include <pthread.h>
#include "error.h"
typedef struct my_struct_tag
{
pthread_mutex_t mutex;
pthread_cond_t cond;
int value;
} my_struct_t;
int main()
{
my_struct_t* data;
data = (my_struct_t*)malloc(sizeof(my_struct_t));
if(data == NULL)
ERROR_ABORT(errno,"Allocate structure");
int status;
status = pthread_mutex_init(&data->mutex, NULL);
if(status != 0)
ERROR_ABORT(status, "Initial mutex");
status = pthread_cond_init(&data->cond, NULL);
if(status != 0)
ERROR_ABORT(status, "Initial condition");
/* .... */
status = pthread_cond_destroy(&data->cond);
if(status != 0)
ERROR_ABORT(status, "Destroy cond");
status = pthread_mutex_destroy(&data->mutex);
if(status != 0)
ERROR_ABORT(status, "Destroy mutex");
free(data);
return 0;
}

等待条件变量

int pthread_cond_wait(pthread_cond_t* cond, pthread_mutex_t* mutex);
int pthread_cond_timedwait(pthread_cond_t* cond, pthread_mutex_t* mutex, struct timespec* expiration);

条件变量与互斥量一起使用,调用pthread_cond_wait或pthread_cond_timedwait时,记得在前面锁定mutex,尽可能多的判断判定条件。上面提到的两个等待条件变量的函数,显示解锁mutex,然后阻塞线程等待状态改变,等待的条件变量signaled后,锁定mutex,返回。记着,这两个函数返回时,mutex一定是锁定的。

多个条件变量可以共享一个互斥变量,相反则不成立。

例程:

1
2
3
4
5
6
7
8
9
10
11
12
13
14
15
16
17
18
19
20
21
22
23
24
25
26
27
28
29
30
31
32
33
34
35
36
37
38
39
40
41
42
43
44
45
46
47
48
49
50
51
52
53
54
55
56
57
58
59
60
61
62
63
64
65
66
67
68
69
70
71
72
73
74
75
76
77
#include <pthread.h>
#include <time.h>
#include "error.h"
#include <errno.h>
typedef struct my_struct_tag
{
pthread_mutex_t mutex;
pthread_cond_t cond;
int value;
} my_struct_t;
my_struct_t data = { PTHREAD_MUTEX_INITIALIZER, PTHREAD_COND_INITIALIZER, 0};
int hibernation = 1;
void* wait_thread(void* arg)
{
int status;
sleep(hibernation);
status = pthread_mutex_lock(&data.mutex);
if(status != 0)
ERROR_ABORT(status, "Lock mutex");
data.value = 1;
status = pthread_cond_signal(&data.cond);
if(status != 0)
ERROR_ABORT(status, "Singal cond");
status = pthread_mutex_unlock(&data.mutex);
if(status != 0)
ERROR_ABORT(status, "Unlock mutex");
return NULL;
}
int main(int argc, char* argv[])
{
pthread_t tid;
int status;
struct timespec timeout;
if(argc > 1)
hibernation = atoi(argv[1]);
status = pthread_create(&tid, NULL, wait_thread, NULL);
if(status != 0)
ERROR_ABORT(status, "Create wait thread");
timeout.tv_sec = time(NULL) + 2;
timeout.tv_nsec = 0;
status = pthread_mutex_lock(&data.mutex);
if(status != 0)
ERROR_ABORT(status, "Lock mutex");
while(data.value == 0)
{
status = pthread_cond_timedwait(&data.cond, &data.mutex, &timeout);
if(status == ETIMEDOUT)
{
printf("Condition wait timed out./n");
break;
}else
if(status != 0)
ERROR_ABORT(status, "timewait");
}
if(data.value != 0)
printf("Condition wa signaled!/n");
status = pthread_mutex_unlock(&data.mutex);
if(status != 0)
ERROR_ABORT(status, "Unlock mutex");
}

唤醒等待条件变量的线程

int pthread_cond_signal(pthread_cond_t* cond);
int pthread_cond_broadcast(pthread_cond_t* cond);

一但有线程由于某些判定条件(predicate)没满足,等待条件变量。我们就有必要当条件满足时,发送信号去唤醒这些线程。

注意:broadcast通常很容易被认为是signal的通用版,其实不能这样理解,准确一点应该说,signal是broadcast的优化版。具体区别不大,但signal效率较broadcast高些。但你不确信有几个线程等待条件变量时用broadcast(When in doubt, broadcast!)。

例程:

1
2
3
4
5
6
7
8
9
10
11
12
13
14
15
16
17
18
19
20
21
22
23
24
25
26
27
28
29
30
31
32
33
34
35
36
37
38
39
40
41
42
43
44
45
46
47
48
49
50
51
52
53
54
55
56
57
58
59
60
61
62
63
64
65
66
67
68
69
70
71
72
73
74
75
76
77
78
79
80
81
82
83
84
85
86
87
88
89
90
91
92
93
94
95
96
97
98
99
100
101
102
103
104
105
106
107
108
109
110
111
112
113
114
115
116
117
118
119
120
121
122
123
124
125
126
127
128
129
130
131
132
133
134
135
136
137
138
139
140
141
142
143
144
145
146
147
148
149
150
151
152
153
154
155
156
157
158
159
160
161
162
163
164
165
166
167
168
169
170
171
172
173
174
175
176
177
#include "error.h"
#include <pthread.h>
#include <time.h>
#include <string.h>
#include <errno.h>
typedef struct alarm_tag
{
struct alarm_tag* link;
int seconds;
time_t time;
char message[64];
} alarm_t;
pthread_mutex_t alarm_mutex = PTHREAD_MUTEX_INITIALIZER;
pthread_cond_t alarm_cond = PTHREAD_COND_INITIALIZER;
alarm_t* alarm_list = NULL;
time_t current_alarm = 0;
/**
* alarm_mutex need to be locked
*/
void alarm_insert(alarm_t* alarm)
{
int status;
alarm_t* next;
alarm_t** last;
last = &alarm_list;
next = *last;
while(next != NULL)
{
if(next->time >= alarm->time)
{
alarm->link = next;
*last = alarm;
break;
}
last = &next->link;
next = next->link;
}
if(next == NULL){
*last = alarm;
alarm->link = NULL;
}
/*for test: output the list*/
printf("[list: ");
for(next = alarm_list; next != NULL; next = next->link)
{
printf("%d(%d)[/"%s/"] ", next->time, next->time-time(NULL), next->message);
}
printf("]/n");
if(current_alarm ==0 || alarm->time < current_alarm)
{
current_alarm = alarm->time;
status = pthread_cond_signal(&alarm_cond);
if(status != 0)
ERROR_ABORT(status,"Signal cond");
}
}
void* alarm_thread(void* arg)
{
alarm_t* alarm;
int sleep_time;
time_t now;
int status, expired;
struct timespec cond_time;
while(1)
{
status = pthread_mutex_lock(&alarm_mutex);
if(status != 0)
ERROR_ABORT(status, "lock");
current_alarm = 0;
while(alarm_list == NULL)
{
status = pthread_cond_wait(&alarm_cond, &alarm_mutex);
if(status != 0 )
ERROR_ABORT(status, "Wait cond");
}
alarm = alarm_list;
alarm_list = alarm->link;
now = time(NULL);
expired = 0;
if(alarm->time > now)
{
printf("[wating: %d(%d)/"%s/"]/n", alarm->time, alarm->time - time(NULL), alarm->message);
cond_time.tv_sec = alarm->time;
cond_time.tv_nsec = 0;
current_alarm = alarm->time;
while(current_alarm == alarm->time)
{
status = pthread_cond_timedwait(&alarm_cond, &alarm_mutex,&cond_time);
if(status == ETIMEDOUT)
{
expired = 1;
break;
}
}
if(!expired)
alarm_insert(alarm);
}else
expired = 1;
if(expired)
{
printf("(%d) %s/n", alarm->seconds, alarm->message);
free(alarm);
}
status = pthread_mutex_unlock(&alarm_mutex);
if(status != 0)
ERROR_ABORT(status, "Unlock mutex");
}
return 0;
}
int main()
{
pthread_t pid;
int status;
char line[128];
status = pthread_create(&pid, NULL, alarm_thread, NULL);
if(status != 0)
ERROR_ABORT(status, "pthread_create");
while(1)
{
fprintf(stdout, "Alarm>");
fgets(line, sizeof(line), stdin);
if(strlen(line) <= 0)
continue;
alarm_t* alarm = (alarm_t*)malloc(sizeof(alarm_t));
if(alarm == NULL)
ERROR_ABORT(errno,"memory can't allocated!");
if(sscanf(line, "%d %s", &alarm->seconds, alarm->message) != 2)
{
printf("Bad Command/n");
free(alarm);
continue;
}
status = pthread_mutex_lock(&alarm_mutex);
if(status != 0)
ERROR_ABORT(status, "pthread mutex locking..");
alarm->time = time(NULL) + alarm->seconds;
/* insert into list*/
alarm_insert(alarm);
status = pthread_mutex_unlock(&alarm_mutex);
if(status != 0)
ERROR_ABORT(status, "pthread mutex unlocking...");
}
return 0;
}

深入Phtread(二):线程的同步-Mutex

发表于 2009-02-11   |   分类于 Linux开发   |  

并行的世界,没有同步,就失去了秩序,就会乱作一团!试想,交通没有红绿灯,生产线产品装配没有一定的顺序… 结果是显而易见的。多个线程也需要同步,否则程序运行起来结果不可预测,这是我们最不能容忍的。交通的同步机制就是红绿灯,Pthread提供了互斥量(mutex)和条件变量(Condition Variables)两种机制去同步线程。

  1. 不变量,临界区和判定条件
  2. 互斥量(Mutex)
  3. 创建和销毁互斥量
  4. 锁定和解锁
  5. 调整mutex大小
  6. 使用多个mutex
  7. 锁定链

1. 不变量,临界区和判定条件

不变量(Invariant):程序所做的一些假设,特别是指变量之间的关系。如:一个queue,有头节点,和其它数据节点,这些元素之间的连接关系就是不变量。当程序里面不变量遭受破坏时,后果往往是很严重的,轻则数据出错,重则程序直接崩溃。

临界区(Critical Section):处理共享数据的一段代码。

判定条件(Predicates):描述不变量状态的逻辑表达式。

2. 互斥量(Mutex)

一般,多个线程之间都会共享一些数据,当多个线程同时访问操作这些共享数据时。问题出来了,一个线程正在修改数据时,另外一个可能也去操作这些数据,结果就会变得不一致了。如(gv=0是共享的数据):

线程A:a = gv; gv = a + 10; 
线程B: b = gv; gv = a + 100;

可能发生A执行完a=gv(0)时,B开始执行b=gv(0); gv=a+100,此时gv=100,然后a执行gv=a+10,最后gv=10。并不是我们要的结果,我们的想法是两个线程并发的给gv加上一个值,期望结果110。^_^ 若这是你银行卡的余额,若没有同步,那就惨了(你往卡里打钱,你有个朋友也同时往你卡里汇钱,很有可能余额只仅加上一方打的)。

互斥量就是为了解决这种问题而设计的,它是Dijkstra信号量的一种特殊形式。它使得线程可以互斥地访问共享数据。如:

互斥量

上图展示了三个线程共享一个互斥量,位于矩形中心线下方的线程锁定了该互斥量;位于中心线上方且在矩形范围内的线程等待该互斥量被解锁,出于阻塞状态,在矩形外面的线程正常运行。刚开始,mutex是解锁的,线程1成功将其锁定,据为己有,因为并没有其它线程拥有它。然后,线程2尝试去锁定,发现被线程1占用,所以阻塞于此,等到线程1解锁了该mutex,线程2立马将mutex锁定。过了会,线程3尝试去锁定mutex,由于mutex被锁定,所以阻塞于此。线程1调用pthread_mutex_trylock尝试去锁定个mutex,发现该mutex被锁定,自己返回继续执行,并没有阻塞。继续线程2解锁,线程3锁定成功,最后线程3完成任务解锁mutex。

3. 创建和销毁互斥量

pthread_mutex_t mutex = PTHREAD_MUTEX_INITIALIZER;
int pthread_mutex_init(pthread_mutex_t* mutex, pthread_mutexattr_t* attr);
int pthread_mutex_destroy(pthread_mutex_t* mutex);

不要尝试去使用复制的的mutex,结果未定义。

静态创建,当mutex以extern或者static存储时,可以用PTHREAD_MUTEX_INITIALIZER初始化,此时该mutex使用默认属性。

1
2
3
4
5
6
7
8
9
10
11
12
13
14
15
16
#include "error.h"
#include <pthread.h>
typedef struct my_struct_tag
{
pthread_mutex_t mutex;
int value;
} my_struct_t;
my_struct_t data = { PTHREAD_MUTEX_INITIALIZER, 0};
int main()
{
return 0;
}

动态创建,往往使用mutex时,都会将它和共享数据绑在一起,此时就需要pthread_mutex_init去动态初始化了,记得用完后pthread_mutex_destroy。

1
2
3
4
5
6
7
8
9
10
11
12
13
14
15
16
17
18
19
20
21
22
23
24
25
#include "error.h"
#include <pthread.h>
typedef struct my_struct_tag
{
pthread_mutex_t mutex;
int value;
} my_struct_t;
int main()
{
my_struct_t* data;
int status;
data = (my_struct_t*)malloc(sizeof(my_struct_t));
status = pthread_mutex_init(&data->mutex, NULL);
if(status != 0)
ERROR_ABORT(status, "pthread_mutex_init");
pthread_mutex_destroy(&data->mutex);
free(data);
return 0;
}

4. 锁定和解锁

原则见上面。

int pthread_mutex_lock(pthread_mutex_t* mutex);
int pthread_mutex_trylock(pthread_mutex_t* mutex);
int pthread_mutex_unlock(pthread_mutex_t* mutex);
1
2
3
4
5
6
7
8
9
10
11
12
13
14
15
16
17
18
19
20
21
22
23
24
25
26
27
28
29
30
31
32
33
34
35
36
37
38
39
40
41
42
43
44
45
46
47
48
49
50
51
52
53
54
55
56
57
58
59
60
61
62
63
64
65
66
67
68
69
70
71
72
73
74
75
76
77
78
79
80
81
82
83
84
85
86
87
88
89
#include <pthread.h>
#include <sys/types.h>
#include "error.h"
#include <errno.h>
#define SPIN 10000000
pthread_mutex_t mutex = PTHREAD_MUTEX_INITIALIZER;
long counter;
time_t end_time;
void* counter_thread(void* arg)
{
int status;
int spin;
while(time(NULL) < end_time)
{
status = pthread_mutex_lock(&mutex);
if(status != 0)
ERROR_ABORT(status, "Lock mutex");
for(spin = 0; spin < SPIN; spin++)
counter++;
status = pthread_mutex_unlock(&mutex);
if(status != 0)
ERROR_ABORT(status, "Unlock mutex");
sleep(1);
}
printf("Coutner is %#lx/n", counter);
return NULL;
}
void* monitor_thread(void* arg)
{
int status;
int misses = 0;
while(time(NULL) < end_time)
{
sleep(3);
status = pthread_mutex_trylock(&mutex);
if(status != EBUSY)
{
if(status != 0)
ERROR_ABORT(status, "Trylock mutex");
printf("Counter is %ld/n", counter/SPIN);
status = pthread_mutex_unlock(&mutex);
if(status != 0)
ERROR_ABORT(status, "Unlock mutex");
}else
misses++;
}
printf("Monitro thread missed update %d times./n", misses);
return NULL;
}
int main()
{
int status;
pthread_t pid_counter;
pthread_t pid_monitor;
end_time = time(NULL) + 60;
status = pthread_create(&pid_counter, NULL, counter_thread, NULL);
if(status != 0)
ERROR_ABORT(status, "fail to create thread counter");
status = pthread_create(&pid_monitor, NULL, monitor_thread, NULL);
if(status != 0)
ERROR_ABORT(status, "fail to create monitor thread");
status = pthread_join(pid_counter, NULL);
if(status != 0 )
ERROR_ABORT(status, "fail to join counter thread");
status = pthread_join(pid_monitor, NULL);
if(status != 0)
ERROR_ABORT(status, "fail to join monitor thread");
return 0;
}

5. 调整mutex大小

mutex应该多大?这里的大小是相对的,如mutex锁定到解锁之间的代码只有一行,比起有10行的就小了。 原则是:尽可能大,但不要太大(As big as neccessary, but no bigger)。考虑下面的因素:

1> mutex并不是免费的,是有开销的,不要太小了,太小了程序只忙于锁定和解锁了。

2> mutex锁定的区域是线性执行的,若太大了,没有发挥出并发的优越性。

3> 自己掂量1和2,根据实际情况定,或者尝试着去做。

6. 使用多个mutex

使用多个mutex一定要注意,防止死锁(deadlock)发生。下面是一个典型死锁:

线程A:pthread_mutex_lock(&mutex_a); pthread_mutex_lock(&mutex_b); ...
线程B:pthread_mutex_lock(&mutex_b); pthread_mutex_lock(&mutex_a); ...

存在这种可能,线程A执行了第一句,锁定了mutex_a;然后线程开始执行第一句锁定mutex_b;然后他们互相等待解锁mutex,A等mutex_b被解锁,B等mutex_a被解锁,不肯让步,出于死锁状态。

1
2
3
4
5
6
7
8
9
10
11
12
13
14
15
16
17
18
19
20
21
22
23
24
25
26
27
28
29
30
31
32
33
34
35
36
37
38
39
40
41
42
43
44
45
46
47
48
49
50
51
52
53
54
55
56
57
58
59
60
61
62
63
#include <pthread.h>
#include "error.h"
#include <time.h>
pthread_mutex_t mutex_a = PTHREAD_MUTEX_INITIALIZER;
pthread_mutex_t mutex_b = PTHREAD_MUTEX_INITIALIZER;
void* thread1(void* arg)
{
while(1)
{
/*sleep(1);*/
pthread_mutex_lock(&mutex_a);
pthread_mutex_lock(&mutex_b);
printf("[%lu]thread 1 is running! /n", time(NULL));
pthread_mutex_unlock(&mutex_b);
pthread_mutex_unlock(&mutex_a);
}
return NULL;
}
void* thread2(void* arg)
{
while(1)
{
/*sleep(1);*/
pthread_mutex_lock(&mutex_b);
pthread_mutex_lock(&mutex_a);
printf("[%lu]thread 2 is running! /n",time(NULL));
pthread_mutex_unlock(&mutex_a);
pthread_mutex_unlock(&mutex_b);
}
return NULL;
}
int main()
{
pthread_t tid1, tid2;
int status;
status = pthread_create(&tid1, NULL, thread1, NULL);
if(status != 0)
ERROR_ABORT(status, "thread 1");
status = pthread_create(&tid2, NULL, thread2, NULL);
if(status !=0)
ERROR_ABORT(status, "thread 2");
status = pthread_join(tid1, NULL);
if(status != 0)
ERROR_ABORT(status, "join thread1");
status = pthread_join(tid2, NULL);
if(status != 0)
ERROR_ABORT(status, "join thread2");
}

解决死锁的方法:

a. 固定锁定顺序(Fixed locking hierarchy):锁定mutex的顺序固定。

线程A:pthread_mutex_lock(&mutex_a); pthread_mutex_lock(&mutex_b); ...
线程B:pthread_mutex_lock(&mutex_a); pthread_mutex_lock(&mutex_b); ...

b. 尝试和回退(Try and back off): 锁定第一个后,尝试锁定下一个,若锁定成功,继续尝试下一个,若锁定失败,解锁先去锁定的。

解锁顺序不会引起死锁.

1
2
3
4
5
6
7
8
9
10
11
12
13
14
15
16
17
18
19
20
21
22
23
24
25
26
27
28
29
30
31
32
33
34
35
36
37
38
39
40
41
42
43
44
45
46
47
48
49
50
51
52
53
54
55
56
57
58
59
60
61
62
63
64
65
66
67
68
69
70
71
72
73
74
75
76
77
78
79
80
81
82
83
84
85
86
87
88
89
90
91
92
93
94
95
96
97
98
99
100
101
102
103
104
105
106
107
108
109
110
111
112
113
114
115
116
117
118
119
120
121
122
123
124
125
126
127
128
129
130
131
132
133
134
135
136
137
138
139
140
141
142
143
144
145
146
147
148
149
150
151
152
153
154
155
156
157
#include <pthread.h>
#include "error.h"
#include <errno.h>
#define ITERATIONS 100
pthread_mutex_t mutex[3] = {
PTHREAD_MUTEX_INITIALIZER,
PTHREAD_MUTEX_INITIALIZER
};
int backoff = 1;
int yield_flag = 0;
void* lock_forward(void* arg)
{
int i, iterate, backoffs;
int status;
for(iterate = 0; iterate < ITERATIONS; iterate++)
{
backoffs = 0;
for(i = 0; i < 3; i++){
if(i == 0)
{
status = pthread_mutex_lock(&mutex[i]);
if(status != 0)
ERROR_ABORT(status,"Lock mutex");
}else
{
if(backoff)
status = pthread_mutex_trylock(&mutex[i]);
else
status = pthread_mutex_lock(&mutex[i]);
if(status == EBUSY)
{
backoff++;
printf("forward locker backing off at %d./n", i);
for(; i >= 0; i--)
{
status = pthread_mutex_unlock(&mutex[i]);
if(status != 0)
ERROR_ABORT(status, "Unlock mutex");
}
}else
{
if(status != 0)
ERROR_ABORT(status, "Lock mutex");
printf("forward locker got %d /n", i);
}
}
if(yield_flag){
if(yield_flag > 0)
sched_yield();
else
sleep(1);
}
}
printf("lock forward got all locks , %d backoffs/n", backoffs);
pthread_mutex_unlock(&mutex[2]);
pthread_mutex_unlock(&mutex[1]);
pthread_mutex_unlock(&mutex[0]);
sched_yield();
}
return NULL;
}
void* lock_backward(void* arg)
{
int i, iterate, backoffs;
int status;
for(iterate = 0; iterate < ITERATIONS; iterate++)
{
backoffs = 0;
for(i = 2; i >= 0; i--){
if(i == 2)
{
status = pthread_mutex_lock(&mutex[i]);
if(status != 0)
ERROR_ABORT(status,"Lock mutex");
}else
{
if(backoff)
status = pthread_mutex_trylock(&mutex[i]);
else
status = pthread_mutex_lock(&mutex[i]);
if(status == EBUSY)
{
backoff++;
printf("backward locker backing off at %d./n", i);
for(; i < 3; i++)
{
status = pthread_mutex_unlock(&mutex[i]);
if(status != 0)
ERROR_ABORT(status, "Unlock mutex");
}
}else
{
if(status != 0)
ERROR_ABORT(status, "Lock mutex");
printf("backward locker got %d /n", i);
}
}
if(yield_flag){
if(yield_flag > 0)
sched_yield();
else
sleep(1);
}
}
printf("lock backward got all locks , %d backoffs/n", backoffs);
pthread_mutex_unlock(&mutex[0]);
pthread_mutex_unlock(&mutex[1]);
pthread_mutex_unlock(&mutex[2]);
sched_yield();
}
return NULL;
}
int main(int argc, char* argv[])
{
pthread_t forward, backward;
int status;
if(argc > 1)
backoff = atoi(argv[1]);
if(argc > 2)
yield_flag = atoi(argv[2]);
status = pthread_create(&forward, NULL, lock_forward, NULL);
if(status != 0)
ERROR_ABORT(status, "Create forward");
status = pthread_create(&backward, NULL, lock_backward, NULL);
if(status != 0)
ERROR_ABORT(status, "Create backward");
pthread_exit(NULL);
}

7. 锁定链

一般用于遍历数据结果(树,链表),一个用于锁定指针,一个锁定数据。

形如:

pthread_mutex_lock(&mutex_a); 
pthread_mutex_lock(&mutex_b); 
...
pthread_mutex_unlock(&mutex_a)
...
pthread_mutex_unlock(&mutex_b)

注意,锁定链往往会出现大量的锁定和解锁操作,有时会得不偿失。

深入Phtread(一):线程的一生

发表于 2009-02-10   |   分类于 Linux开发   |  

我们每个人都并行地活在这个世界上 ,每一天每个人都干着不同的事情。每个人的人生都是不同的,从出生 -> 活着 -> 死去, 个中滋味,只能自己体味了。我们的线程兄弟也一样,只不过它的环境没有人类社会这么复杂,它的一生,被操作系统控制,被我们程序员控制着!呵呵,想想都觉得这兄弟可怜啊!不过这哥们可不许小瞧了,功能大了去了!具体线程的定义和好处参考其它关于线程的资料。该篇主要讲线程兄弟的大体的一生(从被创建到销毁)。进入正题:

线程的一生始终处于下面四种状态之一:

  • Ready 就绪状态,等待处理器的调度。可能是刚新创建的,或阻塞状态,等待的资源得到满足刚解除阻塞状态,或处于运行状态被别的线程抢占了处理器。

  • Running 运行状态,线程正在处理器上运行。多处理器可能会不止一个线程正在运行。

  • Blocked 阻塞状态,线程等待某些资源,不能运行。如:等待一个条件变量,锁定互斥量,或者等待I/O操作的完成。

  • Terminated 终止状态,线程从它的开始函数(创建时指定的)终止。调用pthread_exit或者被其它线程取消(cancelled)。此时,线程并没有被分离(detached),也没有被连接(joined)。一旦线程被joined或detached, 将会被系统回收。

线程的状态图:

线程状态图

1. 创建和使用线程常见的pthread函数

1
2
3
4
5
6
7
8
9
pthread_t thread;
int pthread_equal(pthread_t t1, pthread_t t2);
int pthread_create(pthread_t* thread, const pthread_attr_t* attr, void* (*start)(void*), void* arg);
pthread_t pthread_self();
int sched_yield();
int pthread_exit(void* value_ptr);
int pthread_detach(pthread_t thread);
int pthread_join(pthread_t thread, void** value_ptr);

2. 创建线程:

有一个比较特殊的线程, 就是主线程或者称为初始线程,它是当一个进程被创建时创建的。而其他线程则是在初始线程中调用pthread_create创建的。创建的新线程初始为Ready状态,等待处理器调度。

3. 执行线程:

线程被创建后,就会执行phtread_create的start参数指定的函数,我们可以通过pthread_create的arg参数向线程开始函数传递一个参数,若不想传就直接赋值NULL。

上面提到了一个特殊的线程:初始线程,它的开始函数就是我们学习C/C++见到的第一个函数main,只不过这个开始函数不是由我们来调用的,而是由操作系统Shell。操作系统先初始化进程,然后运行主线程的开始函数main。注意:初始线程和我们自己创建的线程有稍许不同:-开始函数参数不同,main的参数是int arg, char argv,而我们自己的线程参数是void arg。-自己创建的线程开始函数返回了,其它线程可以继续执行。而初始线程开始函数main返回后进程会终止,导致其它正在运行的线程也就被强行终止,若不想在main退出后关闭进程,可以在main最后调用pthreadexit,不过此时该进程就成了僵尸进程(defunct),直到所有线程执行完毕。- 还有一个很重要的区别,多数系统上,初始线程使用的是进程的栈,而自己创建的线程则使用自己的栈,往往自建线程的栈没有初始线程的栈空间大,要注意线程栈溢出哦!(phread提供了修改线程栈大小的函数,后面再说^^)

4. 运行和阻塞

线程兄弟和我们一样,不能一直都醒着工作,它也要休息。线程一生大多处于三种状态:ready, running, 和blocked(和我一样,吃饭,工作,睡觉^_^)。 线程被创建时出于就绪状态,就绪状态等待处理器,处理器有空闲了,线程就转到运行状态疯狂工作,突然发现自己需要的其它资源(互斥量,条件变量)在别的线程手里,或者别的线程优先级比自己大一下从它手里抢走了处理器,或处理器烦了它了(时间片已经用完),或自己不好意思不干事还占用处理器了(等待I/O操作完成),就转换成阻塞状态,停止运行,可以休息下了。 休息可不是给它放长假,任务还没完成了…继续,当等待的资源得到满足,再次投入工作,进入运行状态。周而复始,直到任务完成。

5. 终止线程:

线程一般都是在开始函数执行完时终止的。线程开始函数中调用pthread_exit或者其它线程调用pthread_cancel都可以终止线程。终止后线程处于terminated状态(注意:不是destroyed),然后等待系统回收。

若创建线程时指定线程是detached的,直接在线程开始函数执行完后就会被回收。

若是joinable,那就需要初始线程或其他线程调用pthread_join来等待要终止的线程了, 同时还可以通过pthread_joind的第二个参数获得线程的返回值。pthread_join后,线程就被detached,然后被系统回收。

6. 回收线程

线程创建时,detachsate属性是PTHREAD_CREATE_DETACHED,则在开始函数返回后被回收。

或其他线程使用了pthread_join 或自己调用了pthread_detach,线程出于terminated状态后,立马就会被系统回收:释放系统资源和进程资源,包含线程返回值占用的内存,线程堆栈,寄存器状态等等。

今天就到此,以后深挖!^_^

initramfs 简介,一个新的 initial RAM disks 模型

发表于 2009-02-06   |   分类于 Linux   |  

译自: http://linuxdevices.com/articles/AT4017834659.html (by Rob Landley, TimeSys (Mar. 15, 2005))

问题

当 Linux 内核启动系统时,它必须找到并执行第一个用户程序,通常是 init。用户程序存在于文件系统,故 Linux 内核必须找到并挂载上第一个(根)文件系统,方能成功开机。

通常,可用的文件系统都列在 /etc/fstab,所以 mount 可以找到它们。但 /etc/fstab 它本身就是一个文件,存在于文件系统中。找到第一个文件系统成为鸡生蛋蛋生鸡的问题,而且为了解决它,内核开发者建立内核命令列选项 root=,用来指定 root 文件系统存在于哪个设备上。

十五年前,root= 很容易解释。它可以是软盘或硬盘上的分区。如今 root 文件系统可以存在于各种不同类型的硬件(SCSI, SATA, flash MTD) ,或是由不同类型硬件所建立的 RAID 上。它的位置随着不同启动而不同,像可热插拔的 USB 设备被插到有多个 USB 孔的系统上 - 当有多个 USB 设备时,哪一个是正确的?root 文件系统也可能被压缩(如何?),被加密(用什么 keys?),或 loopback 挂载(哪里?)。它甚至可以存在外部的网络服务器,需要内核去取得 DHCP 地址,完成 DNS lookup,并登入到远程服务器(需账号及密码),全部都在内核可以找到并执行第一个 userspace 程序之前。

如今,root= 已没有足够的信息。即使将所有特殊案例的行为都放进内核也无法帮助设备列举,加密,或网络登入这些随着系统不同而不同的系统。更糟的是,替核心加入这些复杂的工作,就像是用汇编语言写 web 软件 :可以做到,但使用适当的工具会更容易完成。核心是被设计成服从命令,而不是给命令。

为了这个不断增加复杂度的工作, 核心开发者决定去寻求更好的方法来解决这整个问题。

解决方法

Linux 2.6 核心将一个小的 ram-based initial root filesystem(initramfs) 包进内核,且若这个文件系统包含一个程序 init,核心会将它当作第一个程序执行。此时,找寻其它文件系统并执行其它程序已不再是内核的问题,而是新程序的工作。

initramfs 的内容不需是一般功能。若给定系统的 root 文件系统存在于一个加密过的网络块设备,且网络地址、登入、加密都存在 USB 设备 “larry” (需密码方能存取)里,系统的 initramfs 可以有特殊功能的程序,它知道这些事,并使这可以运作。

对系统而言,不需要很大的 root 文件系统,也不需要寻址或切换到任何其它 root 文件系统。

这跟 initrd 有何不同?

Linux kernel 已经有方法提供 ram-based root filesystem,initrd 机制。对 2.4 及更早的 kernel 来说,initrd 仍然是唯一的方法去做这一连串的事。但 kernel 开发者选择在 2.6 实现一个新的机制是有原因的。

ramdisk vs ramfs

ramdisk (如 initrd) 是 基于ram的块设备,这表明它是一块固定大小的内存,它可以被格式化及挂载,就像磁盘一样。这表明 ramdisk 的内容需先格式化并用特殊的工具(像是 mke2fs 及 losetup)做前置作业,而且如同所有的块设备,它需要文件系统驱动程序在执行时期解释数据。这也有人工的大小限制不论是浪费空间(若 ramdisk 没有满,已被占用的额外的内存也不能用来做其它事)或容量限制(若 ramdisk 满了,但其它仍有闲置的内存,也不能不经由重新格式化将它扩展)。

但 ramdisk 由于缓冲机制(caching)实际上浪费了更多内存。Linux 被设计为将所有的文件及目录做缓存,不论是对块设备的读出或写入,所以 Linux 复制数据到 ramdisk及从 ramdisk 复制数据出来,page cache 给 file data 用,而 dentry cache 给目录用。ramdisk 的下面则伪装为块设备。

几年前,Linus Torvalds 有一个巧妙的想法:Linux 的缓存是否可以被挂载一个文件系统?只要保持文件在缓存中且不要将它们清除,直到它们被删除或系统重新启动?Linus 写了一小段程序将缓存包起来,称它为 ramfs,而其它的 kernel 开发者建立一个加强版本称为 tmpfs(它可以写数据到 swap,及限制挂载点的大小,所以在它消耗完所有可用的内存前它会填满)。initramfs 就是 tmpfs 的一个实例。
这些基于ram的文件系统自己改变大小以符合数据所需的大小。增加文件到 ramfs(或增大原有的文件)会自动配置更多的内存,并删除或截去文件以释放内存。在块设备及缓存间没有复制动作,因为没有实际的块设备。在缓存中的只是数据的复制。更好的是这并不是新的程序代码,而是已存在的 Linux 缓存程序代码新的应用,这表示它几乎没有增加大小,非常简单,且基于已经历测试的基础上。

系统使用 initramfs 作为它的 root 文件系统甚至不需要将文件系统驱动程序内建到 kernel,因为没有块设备要用来做文件服务器。只是存在内存中的文件罢了。

initrd vs initramfs

底层架构的改变是 kernel 开发者建立一个新的实现的理由,但当他们在那里时他们清除了很多不好的行为及假设。
initrd 被设计为旧的 root= 的 root 设备检测程序代码的前端,而不是取代它。它执行 /linuxrc,这被用来完成设定功能(像是登入网络,决定哪个设备含有 root 分区,或用文件做为 loopback 设备),告诉 kernel 哪个块设备含有真的 root 设备(通过写入de_t 数据到 /proc/sys/kernel/real-root-dev),且回传给 kernel,所以 kernel 可以挂载真的 root 设备及执行真的 init 程序。

这里假设“真的根设备”是块设备而不是网络共享的,同时也假设 initrd 自己不是做为真的 root 文件系统。kernel 也不会执行 /linuxrc 而做为特殊的进程(ID=1),因为这个 process ID(它有特殊的属性,像是做为唯一无法被以 kill -9 的 process) 被保留给 init,kernel 在它挂载真的 root 文件系统后会等它执行。

用 initramfs,kernel 开发者移除所有的假设。当 kernel 启动了在 initramfs 外的 /init,kernel 即做好决定并回去等待接受命令。用 initramfs,kernel 不需要关心真的 root 档案系统在哪里,而在 initramfs 的 /init 被执行为真的 init,以 PID 1。(若 initramfs 的 init 需要不干涉特别的 PID 给其它程序,它可以用 exec() 系统呼叫,就像其它人一样)

总结

传统的 root= kernel 命令列选项仍然被支持且可用。但在开发支持initial RAM disk支持内核时,提供了许多优化和灵活性。

译者注

查看initramfs的内容

# mkdir initrd
# cd intrd
# cp /boot/initrd.img initrd.img
# gunzip initrd.img
# cpio -i --make-directories < initrd.img
#

创建initramfs

a. mkinitramf

# mkinitramfs -o /boot/initrd.img 2.6.2

Note: 2.6.25是需要创建initramfs的kernel版本号,如果是给当前kernel制作initramfs,可以用uname -r查看当前的版本号。提供kernel版本号的主要目的是为了在initramfs中添加指定kernel的驱动模块。mkinitramfs会把/lib/modules/${kernel_version}/ 目录下的一些启动会用到的模块添加到initramfs中。

b. update-initramfs

更新当前kernel的initramfs

# update-initramfs -u

在添加模块时,initramfs tools只会添加一些必要模块,用户可以通过在/etc/initramfs-tools/modules文件中加入模块名称来指定必须添加的模块。

命令:mkinitramfs, update-initramfs

mkinitcpio

在Arch Linux中,有一个新一代的initramfs制作工具。相对于老的mkinitrd和mkinitramfs,它有以下很多优点。查看详细《使用mkinitcpio》。

参考链接:

  • 精通initramfs构建 http://linuxman.blog.ccidnet.com/blog-htm-do-list-uid-60710-type-blog-dirid-14402.html
  • 制作initramfs镜像 http://www.diybl.com/course/6_system/linux/Linuxjs/200888/135080.html

原文如下:


The problem. (Why “root=” doesn’t scale.)

When the Linux kernel boots the system, it must find and run the first user program, generally called “init”. User programs live in filesystems, so the Linux kernel must find and mount the first (or “root”) filesystem in order to boot successfully.

Ordinarily, available filesystems are listed in the file /etc/fstab so the mount program can find them. But /etc/fstab is itself a file, stored in a filesystem. Finding the very first filesystem is a chicken and egg problem, and to solve it the kernel developers created the kernel command line option “root=”, to specify which device the root filesystem lives on.

Fifteen years ago, “root=” was easy to interpret. It was either a floppy drive or a partition on a hard drive. These days the root filesystem could be on dozens of different types of hardware (SCSI, SATA, flash MTD), or even spread across several of them in a RAID. Its location could move around from boot to boot, such as hot pluggable USB devices on a system with multiple USB ports – when there are several USB devices, which one is correct? The root filesystem might be compressed (how?), encrypted (with what keys?), or loopback mounted (where?). It could even live out on a network server, requiring the kernel to acquire a DHCP address, perform a DNS lookup, and log in to a remote server (with username and password), all before the kernel can find and run the first userspace program.

These days, “root=” just isn’t enough information. Even hard-wiring tons of special case behavior into the kernel doesn’t help with device enumeration, encryption keys, or network logins that vary from system to system. Worse, programming the kernel to perform these kind of complicated multipart tasks is like writing web software in assembly language: it can be done, but it’s considerably easier to simply use the proper tools for the job. The kernel is designed to follow orders, not give them.

With no end to this ever-increasing complexity in sight, the kernel developers decided to back up and find a better way to deal with the whole problem.

The solution

Linux 2.6 kernels bundle a small ram-based initial root filesystem into the kernel, and if this filesystem contains a program called “/init” the kernel runs that as its first program. At that point, finding some other filesystem containing some other program to run is no longer the kernel’s problem, but is now the job of the new program.

The contents of initramfs don’t have to be general purpose. If a given system’s root filesystem lives on an encrypted network block device, and the network address, login, and decryption key are all to be found on a USB device named “larry” (which requires a password to access), that system’s initramfs can have a special-purpose program that knows all about that, and makes it happen.

For systems that don’t need a large root filesystem, there’s no need to locate or switch to any other root filesystem.

How is this different from initrd?

The linux kernel already had a way to provide a ram-based root filesystem, the initrd mechanism. For 2.4 and earlier kernels, initrd is still the only way to do this sort of thing. But the kernel developers chose to implement a new mechanism in 2.6 for several reasons.

ramdisk vs ramfs

A ramdisk (like initrd) is a ram based block device, which means it’s a fixed size chunk of memory that can be formatted and mounted like a disk. This means the contents of the ramdisk have to be formatted and prepared with special tools (such as mke2fs and losetup), and like all block devices it requires a filesystem driver to interpret the data at runtime. This also imposes an artificial size limit that either wastes space (if the ramdisk isn’t full, the extra memory it takes up still can’t be used for anything else) or limits capacity (if the ramdisk fills up but other memory is still free, you can’t expand it without reformatting it).

But ramdisks actually waste even more memory due to caching. Linux is designed to cache all files and directory entries read from or written to block devices, so Linux copies data to and from the ramdisk into the “page cache” (for file data), and the “dentry cache” (for directory entries). The downside of the ramdisk pretending to be a block device is it gets treated like a block device.

A few years ago, Linus Torvalds had a neat idea: what if Linux’s cache could be mounted like a filesystem? Just keep the files in cache and never get rid of them until they’re deleted or the system reboots? Linus wrote a tiny wrapper around the cache called “ramfs”, and other kernel developers created an improved version called “tmpfs” (which can write the data to swap space, and limit the size of a given mount point so it fills up before consuming all available memory). Initramfs is an instance of tmpfs.

These ram based filesystems automatically grow or shrink to fit the size of the data they contain. Adding files to a ramfs (or extending existing files) automatically allocates more memory, and deleting or truncating files frees that memory. There’s no duplication between block device and cache, because there’s no block device. The copy in the cache is the only copy of the data. Best of all, this isn’t new code but a new application for the existing Linux caching code, which means it adds almost no size, is very simple, and is based on extremely well tested infrastructure.

A system using initramfs as its root filesystem doesn’t even need a single filesystem driver built into the kernel, because there are no block devices to interpret as filesystems. Just files living in memory.

Initrd vs initramfs

The change in underlying infrastructure was a reason for the kernel developers to create a new implementation, but while they were at it they cleaned up a lot of bad behavior and assumptions.

Initrd was designed as front-end to the old “root=” root device detection code, not a replacement for it. It ran a program called “/linuxrc” which was intended to perform setup functions (like logging on to the network, determining which of several devices contained the root partition, or associating a loopback device with a file), tell the kernel which block device contained the real root device (by writing the de_t number to /proc/sys/kernel/real-root-dev), and then return to the kernel so the kernel could mount the real root device and execute the real init program.

This assumed that the “real root device” was a block device rather than a network share, and also assumed that initrd wasn’t itself going to be the real root filesystem. The kernel didn’t even execute “/linuxrc” as the special process ID 1, because that process ID (and its special properties like being the only process that can not be killed with “kill -9”) was reserved for init, which the kernel was waiting to run after it mounted the real root filesystem.

With initramfs, the kernel developers removed all these assumptions. Once the kernel launches “/init” out of initramfs, the kernel is done making decisions and can go back to following orders. With initramfs, the kernel doesn’t care where the real root filesystem is (it’s initramfs until further notice), and the “/init” program from initramfs is run as a real init, with PID 1. (If initramfs’s init needs to hand that special Process ID off to another program, it can use the exec() syscall just like everybody else.)

Summary

The traditional root= kernel command-line option is still supported and usable, but new developments in the types of initial RAM disks supported by the kernel provide many optimizations and much-needed flexibility for the future of the Linux kernel. The next article in this series, available in next month’s issue of TimeSource, explains how you can start making the transition to the new initramfs initial RAM disk mechanism.

1…678…10
David++

David++

92 日志
21 分类
60 标签
RSS
GitHub 知乎 微博 豆瓣
© 2007 - 2016 David++
由 Hexo 强力驱动
主题 - NexT.Pisces